

There are few UX workshop activities that work well in any situation. Dot voting is one of them. Dot voting is a simple tool used to democratically prioritize items or make decisions in a group setting. It is an easy, straightforward way to narrow down alternatives and converge to a set of concepts or ideas.
The Dot-Voting Process
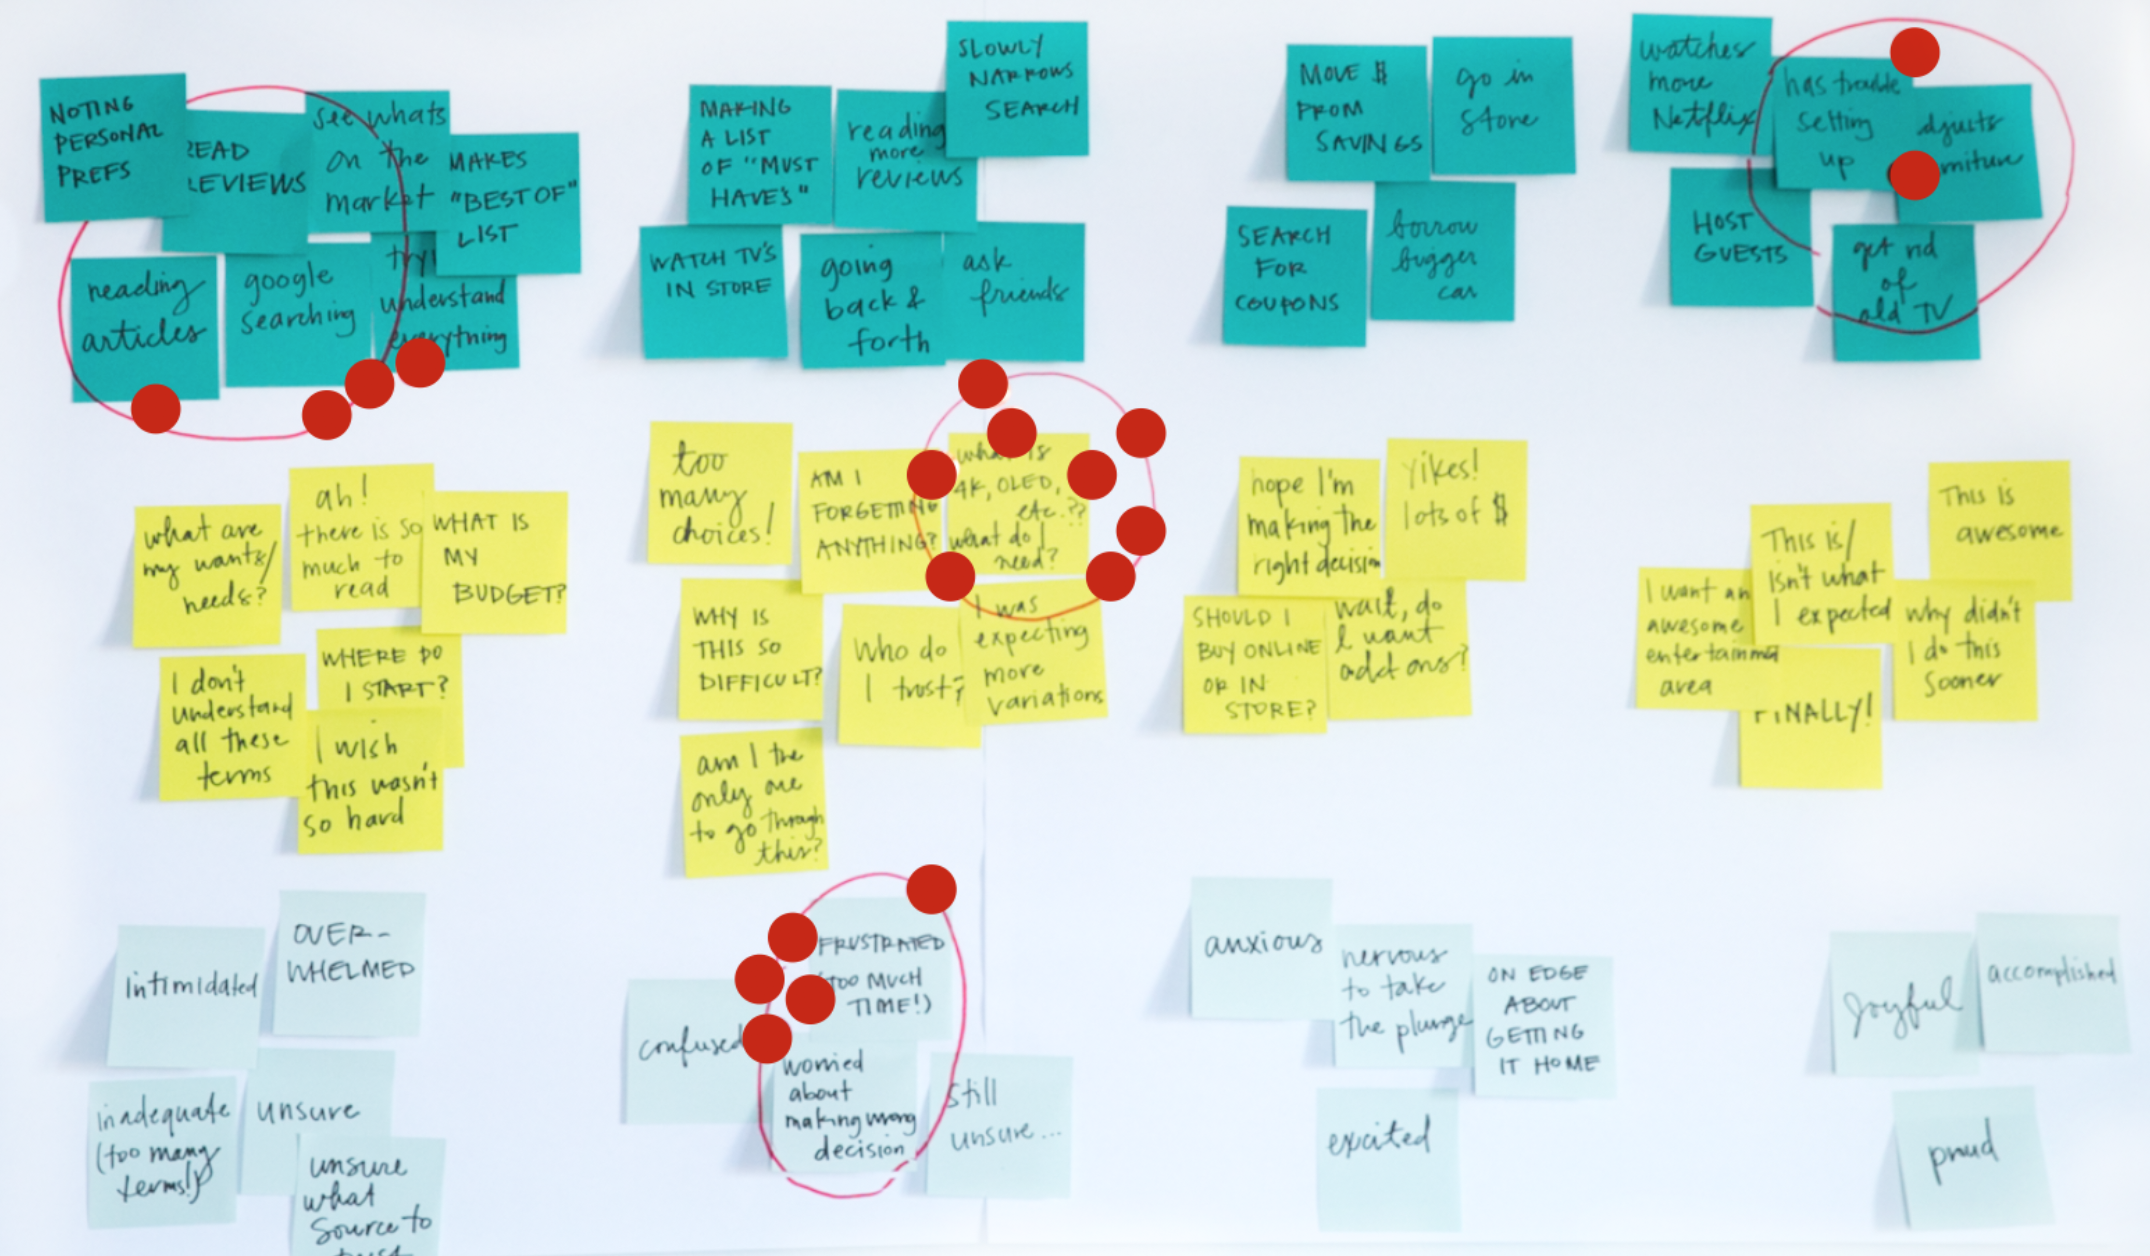
1. Gather Materials.
Your materials will depend on what is voted on and what you use to vote. Most commonly, dot voting is used to vote on options represented on sticky notes (usually hung on a wall or whiteboard) or as a written list on a large, easel-sized pad of paper.
For voting, dot stickers are most commonly used due to their flexibility. In cost-sensitive or impromptu cases, votes can be made with simply a mark (with a pen or marker).
2. Specify voting constraints.
Before the vote, remind individuals of the purpose and value of the exercise. Why are they voting, and how will the outcome be used?
Tell participants how many votes they will have. As a rule of thumb, give each individual roughly several votes equal to roughly a quarter of the options available.
In many cases, it may be worth adding constraint — participants are to vote on the criteria they have either ownership or expertise. For example, if the vote is on possible product features, developers should place their votes based on feasibility, while designers would place their votes based on impact on the user.
3. Vote.
Participants should place their votes quietly. The conversation should not resume until all participants have put their dot or mark—no lobbying during the voting process.
4. Calculate outcome.
Once all individuals have voted, participants can converge and discuss the outcome. When dots are used, the content will resemble a heat map (with concentrated dots in areas that received the most votes). Depending on the goal of the dot voting, participants can discuss why they voted for particular options or assess the next steps now that a collective ranking has been achieved.
5. Potentially narrow and revote.
If there is a tie among the top options or further prioritization is needed, the group can vote again to establish a clear winner. Reissue the same number of votes to each participant, but only allow votes on the top options (usually 2–4) that emerged from the previous vote.
For example, your design team is tasked with creating a new app for tracking personal finances. During a brainstorming session, you have generated a list of 20 potential features for the app. To narrow down the list, you decide to use dot voting.
Each team member is given three dot stickers and asked to place them next to the features they find most promising. After all the votes are tallied, you’ve identified the top five features that received the most votes. You then discussed these top features further and decided which ones to prioritize in the design process based on the dot voting results.
Key takeaways from the dot voting technique include its simplicity, effectiveness, and ability to generate consensus among the design team. By prioritizing ideas using dot voting, teams can save time and focus their efforts on the most promising solutions.
Dot voting is a fundamental, flexible activity that every UX practitioner should have in their back pocket. You can do it quickly or slowly, physically (with dots) or digitally (using a tool or survey). There are no rules — adapt the technique to fit the needs of your group, your context, and your goal.